 Pin it
 My partner started saving vegetable scraps in a freezer bag one winter, and I kept asking what she was planning to do with all those carrot peels and onion skins. When she finally pulled them out three weeks later and turned them into the most golden, fragrant broth I'd ever tasted, I realized I'd been throwing away liquid gold all along. That moment shifted how I cook, and now our kitchen waste has become our secret weapon for soups, risottos, and quiet mornings when a warm mug of broth feels like the best medicine.
Last Tuesday, I was rushing through dinner prep when my five-year-old nephew wandered into the kitchen asking what that amazing smell was. I let him watch as the broth simmered, pointing out how the water was turning this beautiful pale gold color from the carrot peels and onion skins. By the time it was done, he insisted on tasting it plain, and he actually slowed down and sipped it carefully, like he was discovering something precious. That moment taught me that sometimes the simplest, least fancy thing you make becomes the most memorable.
Ingredients
- Vegetable Scraps (5-6 cups): Carrot peels, onion skins, celery ends, leek tops, mushroom stems, garlic skins, and parsley stems are your best friends here—save them in a bag in the freezer and pull them out once you have enough to make a batch.
- Bay Leaves (2): These add an earthy background note that makes the broth taste more complex than it has any right to be.
- Black Peppercorns (8-10 whole): Whole peppercorns release their flavor slowly, giving you warmth without heat or bitterness.
- Garlic (2 cloves, optional): A smashed clove or two deepens the broth, but skip it if you're already using plenty of garlic skins in your scraps.
- Fresh Herbs (small handful): Parsley or thyme stems add brightness—use whatever fresh herbs you have on hand.
- Salt (1-2 teaspoons): Start with less and taste as you go because the broth concentrates as it simmers.
- Cold Water (2 liters): Good cold water is the foundation, so use filtered water if your tap water tastes heavily chlorinated.
Tired of Takeout? 🥡
Get 10 meals you can make faster than delivery arrives. Seriously.
One email. No spam. Unsubscribe anytime.
Instructions
- Get Your Scraps Ready:
- Rinse your vegetable scraps under cold water and pat them dry with a clean kitchen towel. Avoid anything bruised or moldy, and skip the heavily cruciferous stuff like raw broccoli or a ton of raw cabbage because they'll make your broth taste bitter and shadowy.
- Build Your Broth Base:
- Toss the scraps, bay leaves, peppercorns, garlic if using it, and herbs into a large stockpot. Pour in your cold water and add a teaspoon of salt to taste later.
- Bring It to Life:
- Turn the heat to medium-high and let the water come to a gentle boil—you'll see small bubbles start dancing across the surface. Once it reaches that point, turn the heat down to a simmer where just a few bubbles break the surface every few seconds.
- The Patient Simmer:
- Let it bubble gently for a full hour, and every now and then skim away the grayish foam that rises to the top with a ladle. This foam is just impurities and proteins, and removing it keeps your broth clear and clean-tasting.
- Taste and Adjust:
- After an hour, turn off the heat and carefully taste a small spoon of the hot broth. Add more salt if it needs it, remembering that the flavors will concentrate slightly as it cools.
- Strain and Store:
- Pour the broth through a fine-mesh sieve or cheesecloth into a large bowl or container, letting gravity do the work. Discard all the spent scraps and let the broth cool to room temperature before storing it in airtight containers in the fridge for up to five days or the freezer for three months.
 Pin it
 There was an afternoon when my grandmother came to visit and I served her a bowl of broth I'd made from scraps, and she held it between both hands like it was something precious. She told me it tasted like the way her mother used to cook, before everything became convenient, and we sat there in comfortable silence for twenty minutes just sipping and listening to the kitchen settle around us. Food memory is real, and sometimes it's not about the recipe being complicated—it's about remembering that what we make with our hands carries weight.
When to Reach for Scrap Broth
This broth becomes your quiet emergency exit when you need a light soup but don't have the energy for anything complicated. Warm it up with a handful of noodles or rice, add a soft-poached egg, and suddenly you have comfort in a bowl. It's also the base that restaurant-quality risottos and grain dishes are built on, because a vegetable broth made from scraps tastes more honest than anything from a box.
Building a Scrap Stockpile
The magic of this recipe is that it trains you to notice what you've been throwing away. Start keeping a bag in your freezer and toss trimmings in as you prep your weekly vegetables—carrot peels when you're making salad, celery ends when you're making a stir-fry, the green parts of leeks you weren't using anyway. Before long you'll have enough for a batch, and you'll realize you've never actually spent money on a separate ingredient for broth.
The Art of Knowing When It's Done
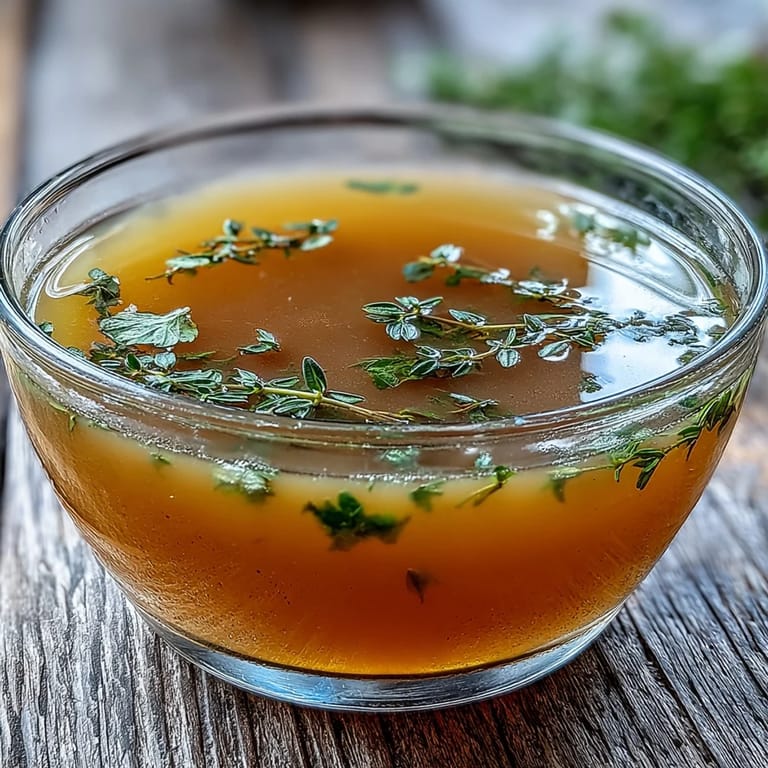
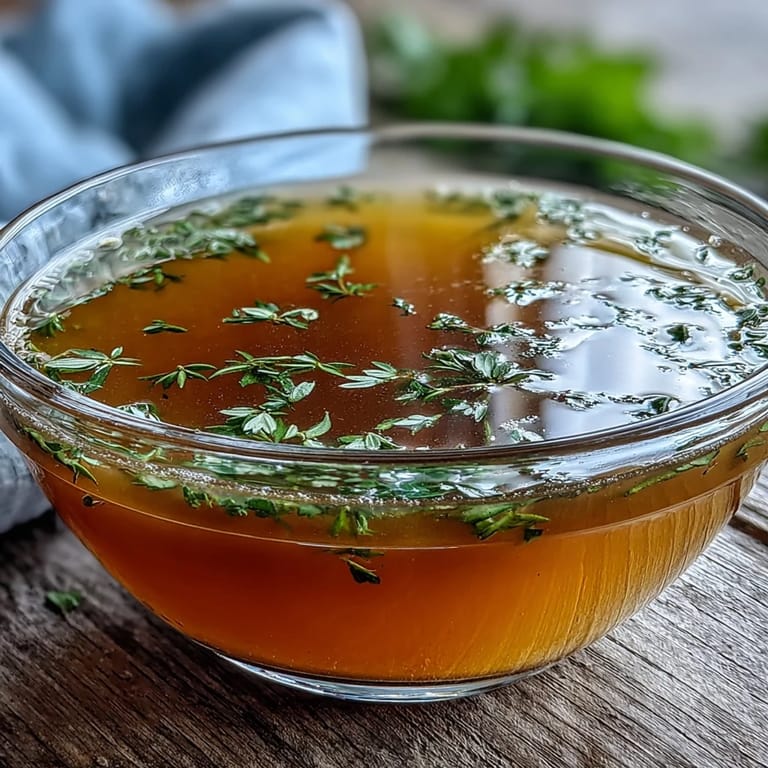
You'll know the broth is perfect when the color is a pale golden-amber and the smell makes you want to just sit with the pot for a moment. The flavor should taste clean and slightly sweet from the carrots and onions, with an earthy background from the bay and herbs. Pay attention to what your nose is telling you, because that's often more reliable than a timer.
- If your broth tastes too weak, you can always simmer it a bit longer to concentrate the flavors further.
- Save a cup of finished broth to taste before straining to make sure the seasoning is exactly where you want it.
- Label your frozen containers with the date so you remember how long they've been sleeping in your freezer.
 Pin it
 Making broth from scraps is one of those small kitchen revolutions that changes how you see cooking—suddenly nothing is waste, and your trash becomes treasure. Once you taste what you've made, you'll never go back to shortcuts.
Recipe FAQs
- → What vegetable scraps work best?
Carrot peels, onion skins, celery ends, leek tops, mushroom stems, garlic skins, and parsley stems create excellent flavor. Potato peels work well too. Avoid cruciferous vegetables like broccoli, cauliflower, and cabbage, as they can create bitter flavors.
- → How long does homemade broth last?
Store in airtight containers in the refrigerator for up to 5 days. For longer storage, freeze in portions for up to 3 months. The broth maintains flavor and nutrition well when properly sealed.
- → Can I enhance the flavor?
Add kombu seaweed or dried shiitake mushrooms for deeper umami notes. Fresh herbs like thyme or parsley sprigs during simmering also enhance complexity. Toasting the vegetable scraps briefly before adding water can deepen the flavor profile.
- → Should I salt during cooking?
Add salt lightly during cooking to taste, but remember the broth will reduce slightly. It's often better to season lightly during preparation and adjust final salt when using the broth in specific dishes, as different uses require varying salt levels.
- → How do I collect enough scraps?
Keep a sealable bag in your freezer and add clean vegetable trimmings as you cook. When the bag is full, you're ready to make broth. This method ensures fresh scraps and makes broth-making convenient without daily pressure.