 Pin it
 My neighbor handed me a box of fresh Thai basil from her garden one summer evening, insisting I had to do something interesting with it. I'd been craving the light, savory rolls I'd eaten at a small Bangkok street vendor years before, and suddenly it clicked—I could recreate that magic in my own kitchen. That first batch was messy, the rolls came apart, and I used way too much filling, but the flavors were absolutely there. Now these beef rolls are something I make whenever I want to feel like I've traveled without leaving home, and honestly, they've become my favorite excuse to have friends over for something that tastes impressive but feels completely approachable.
I made these for a potluck on a warm Friday afternoon, and I was honestly nervous about how they'd travel. But the moment people bit into them and their eyes lit up at that punch of Thai basil and the tender spiced beef, I realized I'd brought something nobody else had—something fresh and alive, not heavy or reheated. One friend asked if I'd worked in a restaurant, and I laughed because the secret was just caring enough to do it right.
Ingredients
- Ground beef (1 lb, 85–90% lean): The higher the lean percentage, the less grease pools in your pan and the cleaner the final flavor—this matters more than you'd think.
- Neutral oil (1 tbsp): Canola, vegetable, or peanut oil all work; avoid olive oil here because it'll fight with the Thai flavors.
- Garlic (3 cloves, minced) and shallot (1 small, finely minced): These two are your aromatic foundation—don't skip the mincing step or you'll end up with chunky rolls.
- Thai bird's eye chilies (2, finely minced): If you can't find fresh ones, crushed red chili flakes work, but the fresh version gives you a cleaner heat and those beautiful little flecks of color.
- Red bell pepper (1 small, finely diced): Dicing small means the pepper softens quickly and distributes evenly through the beef without overpowering it.
- Green onions (3, thinly sliced): Keeping the white and green parts separate is a technique that sounds fussy but makes a real difference—whites go in early for depth, greens at the end for fresh pop.
- Fresh Thai basil (1 cup, loosely packed, roughly chopped): This is the soul of the dish—if you absolutely can't find it, regular sweet basil is your backup, though the anise-like flavor won't be quite the same.
- Lime juice (1 tbsp): Add this at the very end so the brightness doesn't cook off; it's your final flavor wake-up call.
- Soy sauce (1 1/2 tbsp), fish sauce (1 tbsp), oyster sauce (1/2 tbsp), dark soy sauce (optional): Together these create an umami-rich glaze that coats every morsel of beef—the dark soy adds color and a subtle molasses note if you're feeling fancy.
- Brown or palm sugar (2–3 tsp): Just enough to balance the salty and sour elements without making the filling sweet; taste as you go.
- Rice paper wrappers (12–16 large): The 22 cm size is standard and forgiving for rolling; don't buy the super-thin ones unless you're experienced.
- Cooked jasmine rice or rice vermicelli (1 1/2 cups): This is technically optional, but I always include it because it adds substance and helps hold everything together when you bite into the roll.
- Fresh vegetables (lettuce, cucumber, carrots, cilantro, basil, mint): The vegetables are your textural contrast—julienne the cucumber and carrots so they don't just slide around inside the roll.
- Fish sauce, lime juice, sugar, garlic, and chilies for dipping sauce: This sauce is where simplicity becomes magic; it's literally five ingredients that somehow taste like you've been cooking all day.
Tired of Takeout? 🥡
Get 10 meals you can make faster than delivery arrives. Seriously.
One email. No spam. Unsubscribe anytime.
Instructions
- Blend your sauce base:
- Whisk together the soy, fish, and oyster sauces with the sugar in a small bowl until the sugar dissolves completely—taste it now and remember this flavor as your reference point. Add a tablespoon or two of water to loosen it into something glossy and pourable.
- Wake up the aromatics:
- Heat your oil in a large skillet over medium-high heat; once it shimmers, add the garlic and shallot and let them sizzle for about 30 to 45 seconds until they're fragrant and just barely golden. This is the moment the kitchen smells like something important is happening.
- Layer in the heat and brightness:
- Stir in the minced chilies and the white parts of your green onions—another 20 to 30 seconds, just enough for the aroma to build without burning anything. You're building layers of flavor, not rushing through.
- Cook the beef with intention:
- Add your ground beef and use a spatula to crumble it as it cooks, breaking it into small, even pieces rather than large chunks—this takes 4 to 6 minutes and the beef should be mostly cooked with some light browning. Stir frequently so nothing sticks or steams.
- Add the pepper and let it soften:
- Toss in the diced red bell pepper and cook for 2 to 3 minutes until it's lost its raw crunch but still holds its shape. You want tender, not mushy.
- Coat everything in the sauce:
- Pour your prepared sauce over the beef and vegetables, then toss everything to coat evenly—let it cook for another 2 to 3 minutes so the sauce reduces and clings to the meat rather than sitting in a pool. This is when you adjust seasoning; taste a tiny bit and add more soy, sugar, or lime as needed.
- Introduce the basil at the last second:
- Reduce the heat to low, add your chopped Thai basil and the green parts of the green onions, and toss just until the basil wilts—this should take maybe 30 to 45 seconds. You're not cooking the basil; you're just warming it enough to release its oils.
- Finish with brightness:
- Turn off the heat and stir in the fresh lime juice—this goes in after everything else cooks so it stays sharp and alive.
- Let it rest while you prep:
- Transfer the beef mixture to a plate or bowl and let it cool to room temperature; this usually takes about 10 to 15 minutes and gives you time to cook your rice if you're using it, prep all your vegetables, and arrange them in bowls at your rolling station.
- Build your dipping sauce:
- In a clean bowl, combine the fish sauce, lime juice, sugar, and warm water, stirring until the sugar dissolves—then add your minced garlic, sliced chilies, and any optional carrot or herbs. Taste it now: it should make you pucker slightly from the lime, hit you with salt, then round out with sweetness and heat. Adjust the balance to your preference; some people like it more sour, others prefer more heat.
- Set up your rolling station like a pro:
- Fill a large shallow dish with warm water (not hot, or the wrappers will tear and fall apart), lay out a clean board or plate lightly oiled if your surface is sticky, and arrange all your fillings within arm's reach. Everything should be ready to go before you dip the first wrapper.
- Soften the wrapper with care:
- Working one at a time, dip a rice paper wrapper into the warm water, rotating it so all sides touch the water for about 3 to 5 seconds—it should feel slightly soft but still a bit stiff when you pull it out. Place it on your board and let it sit for a few seconds; it will continue to soften as it sits, and this is actually the ideal moment to fill it.
- Layer your fillings in the right order:
- Start with about 2 to 3 tablespoons of cooled rice or noodles on the bottom third of the wrapper in a tidy line, then top with 2 to 3 tablespoons of the beef mixture directly on top of the rice. Add a few strips of cucumber, carrot, a small handful of lettuce, and a pinch each of cilantro, basil, and mint—the secret is not overfilling, which is hard because everything looks good.
- Roll with confidence and intention:
- Fold the bottom edge of the wrapper up and over the filling, then fold in both sides toward the center, and roll tightly away from you like you're wrapping a burrito—keep tension as you roll so the cylinder is snug and neat. The whole thing should come together in about 10 seconds once you get the rhythm.
- Rest them seam-side down:
- Place each finished roll seam-side down on a plate so it doesn't unroll, and continue until you've used all your filling. If you're serving them later, cover the whole plate with a damp kitchen towel and then plastic wrap to keep them from drying out.
- Slice and serve:
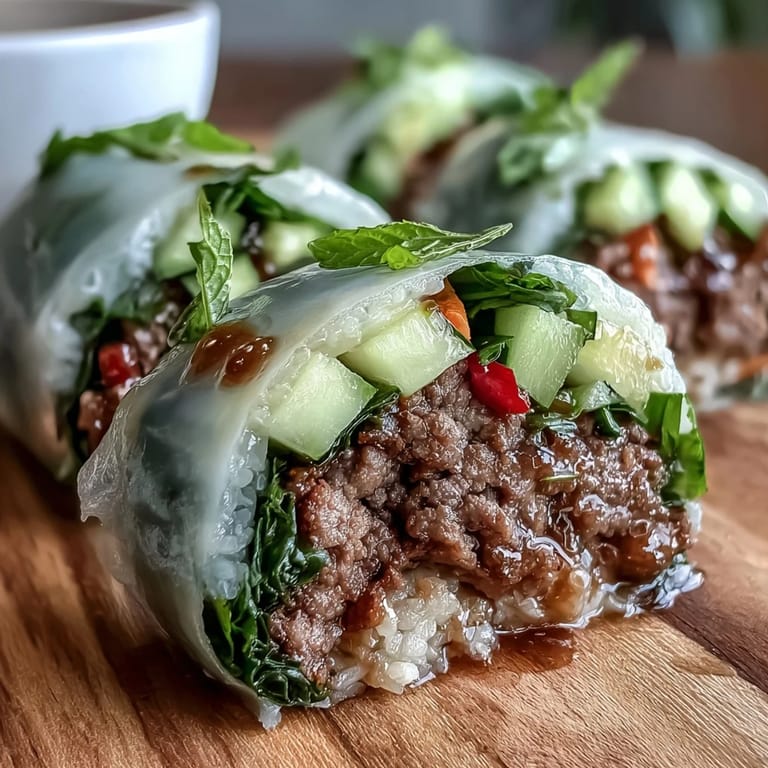
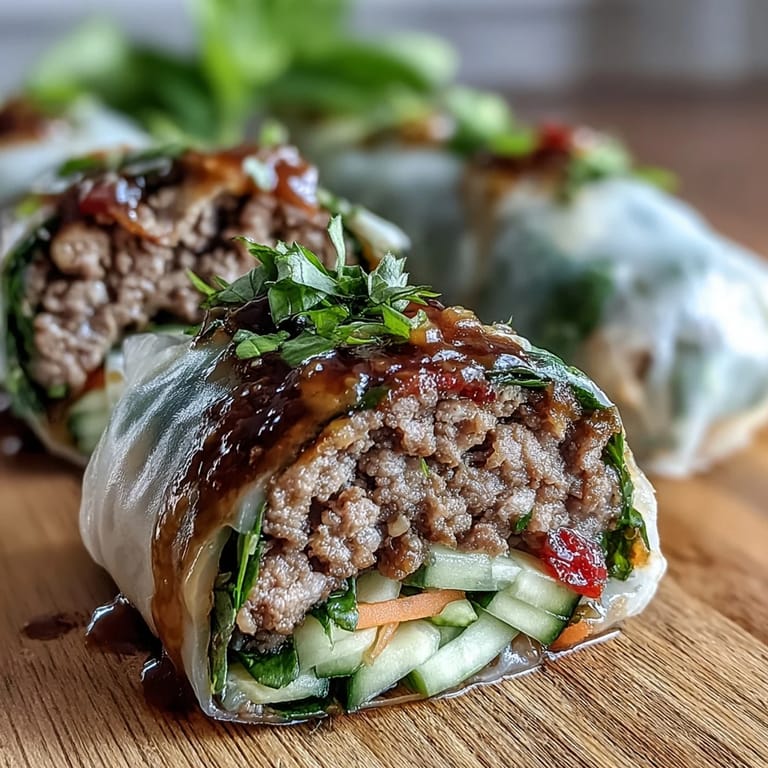
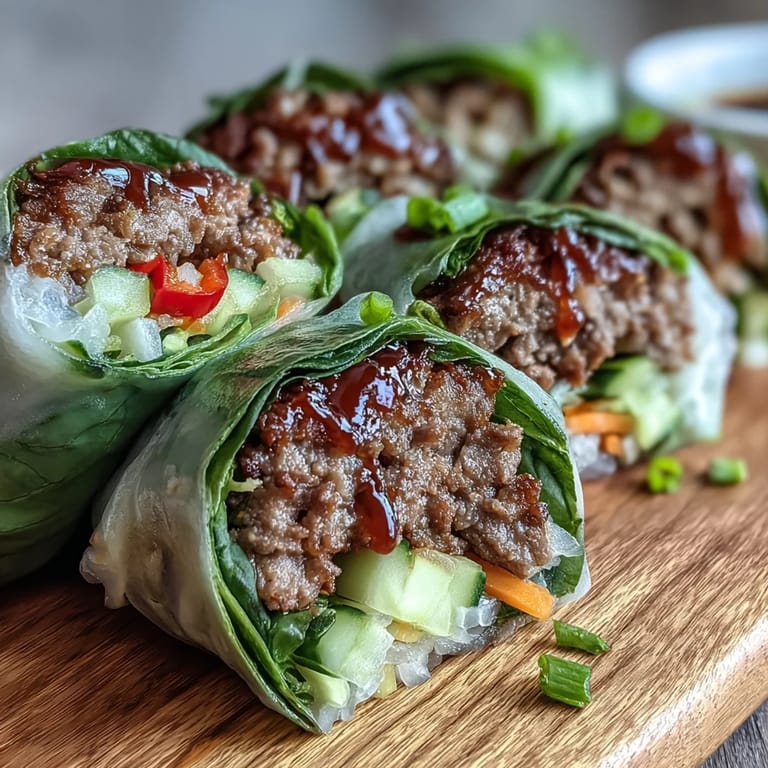
- You can serve the rolls whole, or slice them diagonally on a slight angle to show off those layers of color inside—arrange them on a platter and set out the dipping sauce in a small bowl. They're best served immediately while the wrapper is still slightly soft and everything is fresh.
 Pin it
 There's a moment during rolling, usually around roll number four or five, when your hands suddenly know what they're doing without you thinking about it. That's when it stops feeling like a task and starts feeling like you're creating something, and that's when people walking into your kitchen will ask if they can have one right now instead of waiting until dinner. These rolls have that effect—they look restaurant-quality but taste homemade, which is honestly the best compliment a dish can get.
The Thai Basil Factor
Thai basil is not sweet basil's quiet sibling—it's the bold, charismatic cousin who shows up with anise-like licorice notes and a slightly peppery edge that transforms ground beef from simple comfort food into something aromatic and alive. The first time I understood this distinction was when I grabbed regular basil instead at the market and made these rolls; they were fine, but they lacked that singular fragrance that makes people ask what you did differently. If you can't find Thai basil at an Asian market or well-stocked grocery store, growing a small pot on your windowsill is genuinely worth the effort because you'll use it in stir-fries, curries, and salads all summer long.
Rolling Technique Matters More Than Perfection
Your first rolls will probably look lumpy or slightly loose, and that's completely normal—the beauty is that they'll still taste amazing because the filling is what people are actually eating. What matters is developing a consistent motion: dampen the wrapper, lay it down, layer your fillings strategically so the heaviest stuff sits on the rice, fold bottom then sides then roll, and place seam-side down on the plate. Once you've made ten rolls, you'll find your rhythm, and after twenty, you won't even have to think about it anymore. The imperfect rolls are often the ones that taste best because you're focused on flavor layers rather than presentation.
Make It Your Own
The beauty of this recipe is that it's really a template—you can swap the beef for shrimp, ground chicken, or tofu without changing the technique at all. I've made versions with crispy bacon, leftover rotisserie chicken, and even sautéed mushrooms when cooking vegetarian for friends. The dipping sauce stays the same, the vegetables are infinitely customizable, and the wrapper is just a vehicle for whatever combination speaks to you. Some people add peanut butter to their dipping sauce for richness, others add a tiny squeeze of garlic chili paste for extra depth.
- Try adding shredded red cabbage for extra crunch and a subtle sweetness.
- Experiment with different proteins—shrimp, ground turkey, or even crispy tofu work beautifully.
- If you make these regularly, keep a mental note of what fillings and herb combinations you love best so you can make them instinctively.
 Pin it
 Every time I make these, I end up happier than I expected—not just because they taste incredible, but because the process of rolling them feels meditative and the result is something you can serve with confidence. There's something deeply satisfying about creating something this elegant and delicious with your own two hands.
Recipe FAQs
- → Can I make Thai basil beef rolls ahead of time?
Yes, you can prepare the beef filling and dipping sauce up to 2 days in advance. Store them separately in airtight containers in the refrigerator. Assemble the rolls shortly before serving for best texture—if stored too long, the rice paper becomes tough and the vegetables lose their crunch.
- → What can I substitute for Thai basil?
Regular sweet basil combined with fresh mint makes an excellent substitute. Italian basil provides similar anise notes, while mint adds that bright, cooling element typical of Thai cuisine. Use roughly three-quarters basil and one-quarter mint to mimic the flavor profile.
- → How do I prevent rice paper from tearing?
Use warm—not hot—water and dip wrappers briefly for just 3–5 seconds. They'll continue softening as you work. Don't oversoak, and handle gently once pliable. Lightly oiling your work surface helps prevent sticking. Fill generously but don't overstuff, which causes tears during rolling.
- → Can I use a different protein than ground beef?
Absolutely. Ground turkey, chicken, or pork work beautifully with the same seasoning blend. For a vegetarian version, use crumbled tofu or finely chopped mushrooms, and substitute vegetarian fish sauce or soy sauce to maintain depth of flavor.
- → How long do assembled rolls keep?
Fresh rolls are best enjoyed within 2–3 hours of assembly. If you must store them, cover tightly with plastic wrap and refrigerate, but know the rice paper will become somewhat tough. Let them sit at room temperature 10–15 minutes before serving to soften slightly. Never freeze assembled rolls.
- → Is there a gluten-free option?
Yes. Use gluten-free soy sauce or tamari, gluten-free oyster sauce (or omit), and ensure your rice paper wrappers are certified gluten-free. The remaining ingredients—rice paper, vegetables, herbs, and fresh beef—are naturally gluten-free.