 Pin it
 The first time I tackled a Rosé Velvet Cake, the kitchen was humming with the late morning playlist and the counter was already dusted with a blush of powdered sugar. As I measured out the flour and sipped on a leftover splash of rosé, it occurred to me how this cake seemed to bottle up the feeling of anticipation before a celebration. It's that gentle aroma—the mingling of cocoa and wine with creamy frosting—that signals something special is about to happen. Even now, the memory of swirling edible gold over the frosting still feels delightfully extra. A tiny bit of shimmer for a cake that's all about joyful moments.
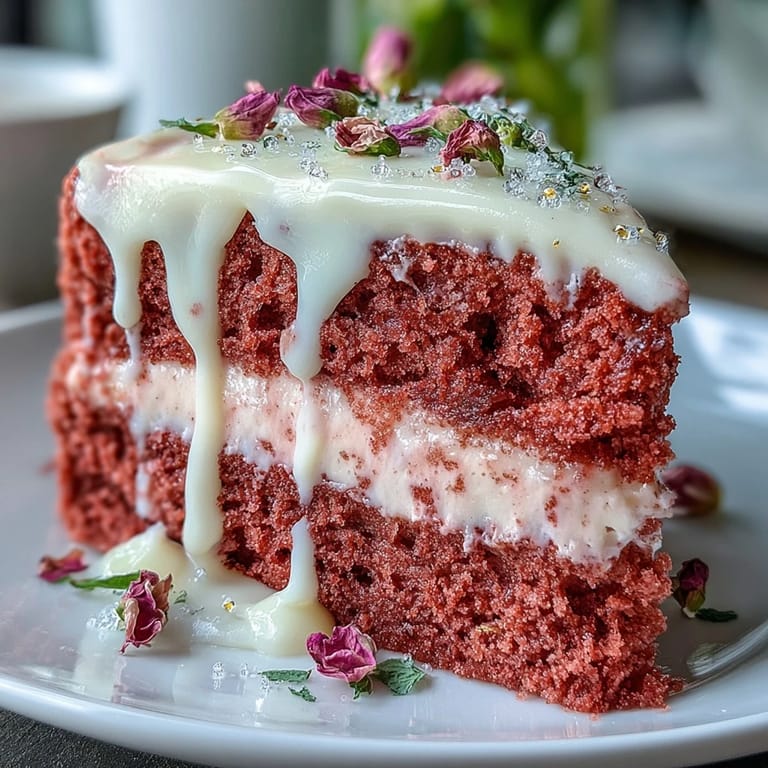
It was during a bustling bridal shower—guests fluttering about in pastel dresses, laughter echoing down the hall—when this cake first stole the spotlight. Slicing through those rosy tiers while everyone waited, I felt an odd mix of pride and relief, especially remembering how my hands had shaken slightly painting on the gold drip just hours earlier.
Ingredients
- All-purpose flour: Measuring carefully ensures a tender, fluffy crumb; I always fluff the flour with a spoon before scooping.
- Granulated sugar: Creaming it well with the butter gives that essential light texture; don't rush this step.
- Baking soda and baking powder: Using both gives just the right lift; check their freshness for best results.
- Salt: Enhances the cocoa and rosé flavors—skip it at your cake's peril.
- Unsweetened cocoa powder: This creates the subtle chocolate depth without overpowering the delicate pink hue; sift out any lumps.
- Unsalted butter: Room temperature is a must for proper creaming; cold butter leads to dense cakes every time.
- Buttermilk: Adds tang and keeps the cake moist—bring it to room temp so the batter blends evenly.
- Rosé wine: The signature ingredient; pick a dry, fragrant rosé for vibrant flavor and color.
- Large eggs: Room temperature eggs bind everything beautifully; cold eggs can cause the batter to curdle.
- Vanilla extract: I never skip or skimp here; good vanilla makes the frosting aromatic.
- White vinegar: Enhances the cake’s tender texture—don’t worry, you’ll never taste it.
- Pink food coloring gel: A little goes a long way; add it sparingly to achieve that lovely blush.
- Cream cheese: Make sure it’s soft for a silky, lump-free frosting.
- Powdered sugar: Sifted is best for a smooth, soft-whipped finish.
- Heavy cream: Use fresh for a glossy, perfect drip; overheat and it’ll seize.
- White chocolate chips: These melt and set easily for the signature drip; use a good-quality brand.
- Edible gold luster dust: Brings the “wow”; a little brush goes a long way.
- Vodka or clear extract: It helps dissolve the luster dust—don’t substitute with water.
Tired of Takeout? 🥡
Get 10 meals you can make faster than delivery arrives. Seriously.
One email. No spam. Unsubscribe anytime.
Instructions
- Prep the pans:
- Line and butter the cake pans; you’ll hear the parchment crinkle and feel reassured you won’t lose a crumb later.
- Mix dry ingredients:
- Sift flour, cocoa, baking soda, baking powder, and salt; enjoy the gentle cloud that rises and the scent of cocoa.
- Cream butter and sugar:
- Beat until pale and fluffy, scraping the sides as you chat or hum, feeling the grains dissolve under the beater.
- Add eggs and vanilla:
- Drop in eggs one at a time, watching them blend silky-smooth, then pour in the vanilla for that cozy aroma.
- Combine liquids and dry mix:
- Alternate buttermilk, rosé, and vinegar with flour mixture; mix gently and admire the pale pink batter as you add color.
- Add color:
- Dip a toothpick in pink food gel and swirl through the batter, stopping at that perfect blush shade.
- Bake:
- Divide evenly in pans, smoothing tops; you’ll know they’re done when edges pull just slightly from the pan and a toothpick comes out clean.
- Cool:
- Let cakes rest in their pans—steam will rise and the aroma will fill your kitchen—then gently tip out onto racks.
- Whip frosting:
- Beat butter and cream cheese till fluffy, then add powdered sugar a scoop at a time and whip in rosé and vanilla until cloud-light.
- Layer and frost:
- Use an offset spatula to spread frosting between layers and around the sides; don’t stress if it’s not perfect, it’s the love that people taste.
- Crumb coat and chill:
- Sweep a thin layer across the whole cake and pop it in the fridge to set—this keeps crumbs from sneaking into the final coat.
- Final frost:
- Cover with another, thicker layer of frosting; smooth and swoosh as you go.
- Make the gold drip:
- Melt white chocolate and cream together; let it cool until thick yet pourable, then drip from the edge for a dramatic finish.
- Paint the drip gold:
- Mix gold luster dust with vodka, and gently brush over set chocolate drips; step back and admire your artistry.
- Chill and serve:
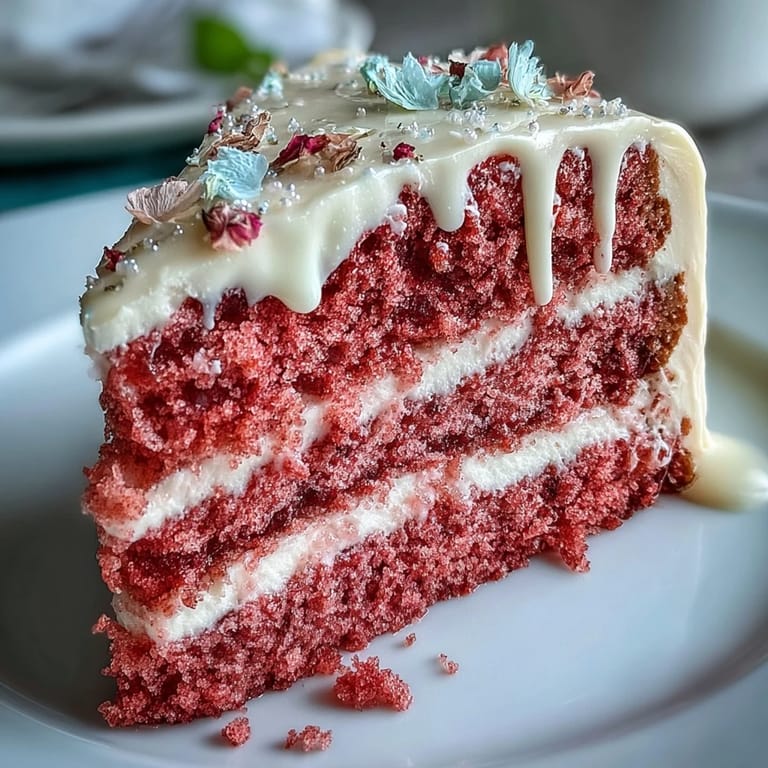
- Refrigerate the finished cake until ready to cut and celebrate; each slice reveals those beautiful blushing layers.
 Pin it
 Sometime amid frosting the layers, someone peeked in and marveled at the scent—equal parts excitement and delicate cocoa. It was the moment the cake was carried out, sunlight bouncing off the gold drip, that this dessert truly became a centerpiece for happy memories, not just a recipe on my fridge.
Making the Rosé Flavor Shine
The trickiest part I’ve learned is not to let the wine overpower or vanish; tasting the batter before baking ensures you hit the right floral note. Brushing a little rosé onto the cooled cakes, especially if you like it a bit punchier, gives the tender crumb that playful grown-up twist.
Decorating With Ease
Dabbing edible gold always felt intimidating until I realized how forgiving it truly is—wobbly lines only make it more unique. Edible flowers, gold leaf, or even a handful of fresh berries lend that special occasion energy with so little effort.
Serving and Storing for Celebrations
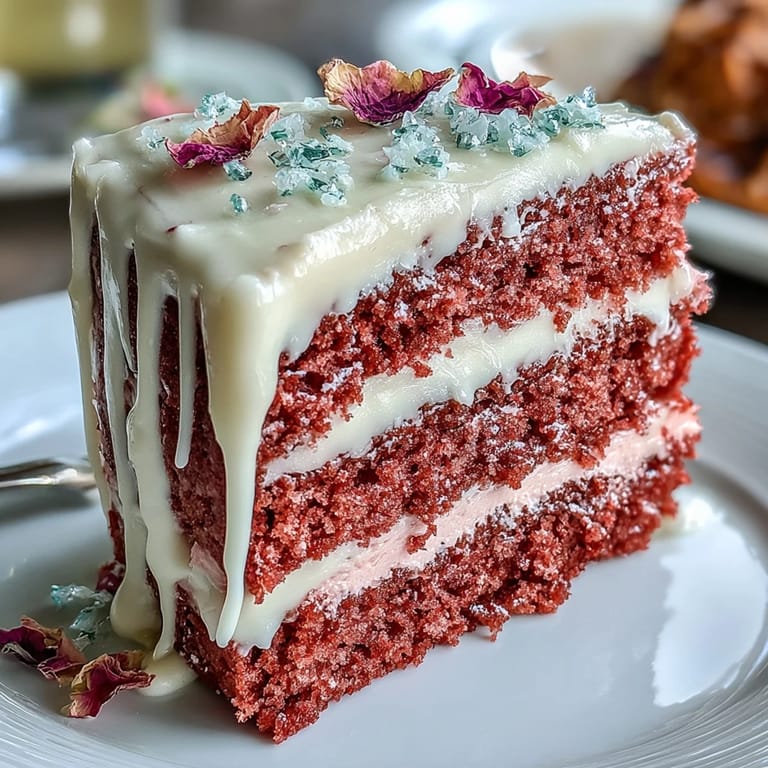
Let the cake chill just a bit before slicing for cleaner edges and less frosting smudge—trust me, it’s worth the wait.
- If you store leftovers, keep them airtight in the fridge for up to three days.
- A cold knife makes for picture-perfect slices, especially with that velvety crumb.
- Be sure to let decorated cake come to room temp before serving for the best texture and flavor.
 Pin it
 Here’s hoping your kitchen fills with the same giddy anticipation and delicate sweetness that this cake brings to mine. Serve with a toast—even if it’s just sparkling juice—and watch your celebration light up.
Recipe FAQs
- → How can I boost the rosé flavor without making the batter too wet?
Brush a light syrup made from reduced rosé (or grape juice) onto baked, cooled layers rather than adding extra liquid to the batter. This concentrates flavor without altering texture.
- → What non-alcoholic swap keeps the same flavor profile?
Use chilled sparkling grape juice or a concentrated grape reduction in the frosting and for brushing layers. It maintains the fruity notes while remaining alcohol-free.
- → How do I get a smooth, even gold finish on the drip?
Use a cooled but pourable white-chocolate ganache for the drip, apply sparingly at the edge, then mix gold luster dust with a small amount of clear extract or vodka and gently paint once the chocolate sets slightly.
- → Why did my layers sink in the center, and how can I avoid it?
Overmixing or underbaking can cause sinking. Mix until just combined and test with a toothpick near the end of baking. Allow pans to cool briefly before turning out to prevent collapse.
- → What's the best way to achieve sharp edges before the gold drip?
Apply a thin crumb coat and chill the cake for at least 30 minutes. Use a final layer of frosting with an offset spatula and a hot water–dipped bench scraper for clean, sharp edges.
- → How should I store the finished cake and how long will it keep?
Keep the finished cake refrigerated in a cake box or under a dome to protect decorations. It will keep well for 2–3 days; bring to room temperature before serving for best texture.